The following parameters for garden irrigation are important for your planing, water pressure and water flow:
Which water pressure (bar) does the extraction source (faucet or garden pump) supply?
Which water flow (l / min) is available?
These characteristics affect the number of sprinklers per pipeline string that can be connected behind a solenoid valve.
Characteristic – water pressure
If there is no information available, there are two ways to determine the water pressure:
Find out the water pressure using a stopwatch
Although this method is not quite accurate, it gives an approximate value. For this purpose, a stopwatch and a water bucket is needed. First put a 10l bucket under the tap. Then turn on the faucet fully and simultaneously press the stopwatch. Once the bucket is full, the time spent is stopped. If it took about 25 seconds for the bucket to fill, the water pressure is about 5 bar. If the time is about 40 seconds, you can expect from about 3.5 bar.
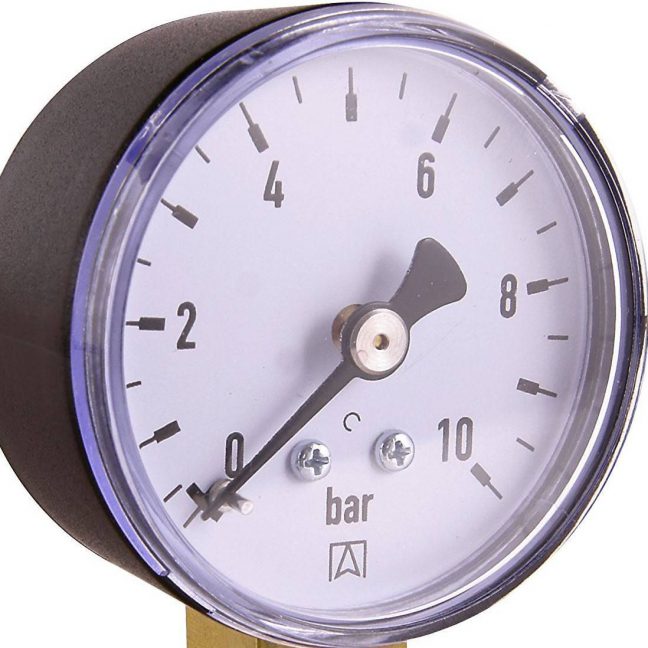
Measure water pressure with the manometer
Of course, this solution provides the more accurate water pressure. For this one needs a manometer, which one can buy on-line. In addition, for Gardena water pipeline installation, a Gardena (# 2790-20) tee with 3/4″ female thread and a brass fitting reducer is required as the manometer has a 1/4″ thread water connection.
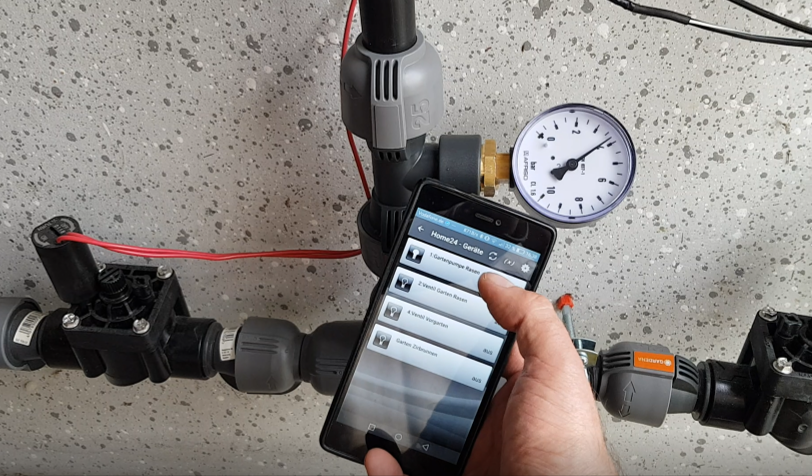
Information on installing the manometer can also be found on my YouTube channel.
The water pressure can be read directly on the pressure gauge. When planning the system, a permanently installed pressure gauge should be installed. In my water pipeline are about 3.8 bar pressure.
Characteristic – water flow
To measure the water flow you need a 10l bucket. First, the water inlet is fully turned on and the time is measured by stopwatch, until the bucket is full. The measured time is then used in the following formula: (10 liters x 60) / time in seconds = flow rate in l / min
For example, the following values apply to the water flow:
15sec ==> 40l / min
30sec ==> 20l / min
40sec ==> 15l / min
Furthermore, you will find in my blog entry under checklist automatic garden irrigation, how to use the measured values for the planning of irrigation.
You are on my blog: Parameters for garden irrigation
To reach a well thought out automatic garden irrigation, start with the planning phase. You should be aware of all conditions before the construction of an automatic garden irrigation system. To plan your automatic garden irrigation perfectly, you will find here a step by step guide and the checklist for automatic garden irrigation.
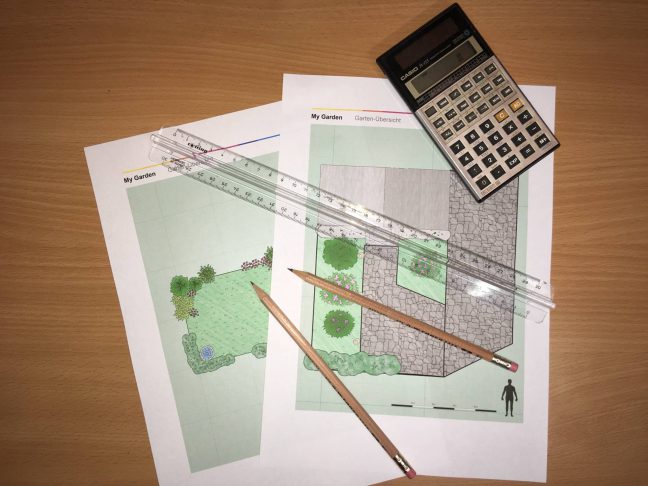
Draw a plan of the garden
To create a plan you need some tools. In addition to pencil and eraser, you need a ruler. For the drawing of the scale plan, use a scale of 1:100 or 1:50.
Start with measuring the garden, for this we use a measuring tape. Best start with the boundaries of the property and draw it on your sheet. To use the sheet optimally, start with the longest side and set the scale. If you can divide the garden into several areas, use separate pages to record the individual areas.
After capturing the garden outlines , draw in all the surfaces that you want to irrigate. Then mark these areas as lawns, flowerbeds, shrubs and trees. In addition, mark the areas house, garage, terrace, paths and ponds that should not be irrigated.
Furthermore draw the water source (faucet or garden pump) on your plan. For further planning you need the parameters water pressure (bar) and water flow (l/h). Please look at the following blog entry: Parameters for garden irrigation.
In order to decide which type of sprinkler should be used where, one can use the following rule: use Hunter Rotators for surfaces larger than 5m radius, Hunter MP Rotators for surfaces up to 5m and micro irrigation for direct root irrigation.
Now, if you look at the plan of the garden, you can define several different irrigation circuits. One can make a very differentiated consideration, which also gives a complex garden irrigation solution, or you can be a little more generous. I would like to refer again to my solution under The project. As describe, in my backyard two Hunter Rotators are active to watering the lawns, flowers and shrubs. This could have been improved with spray nozzles or micro irrigation, but after 4 summers this has proven to be sufficient. In order to not irrigate all surfaces in the front yard, I used MP Rotator with spray nozzles.
Sprinkler position
If you have marked the areas for irrigation and drawn the position of the sprinklers, you get the irrigation lines. Please note the following points regarding the number of irrigation lines:
use of number of sprinklers. The parameter water flow is to consider.
Number of separate garden areas available.
For each irrigation line use similar sprinkler models. No combination of sprinkler and micro irrigation
When calculating the sprinklers please read the following blog entry: Calculation Sprinkler.
If there are several irrigation lines during your planning, everyone receives a irrigation valve. The Homematic home automation system allows each irrigation line to switch on for different periods of time, since different sprinkler models also supply different amounts of water per hour.
Draw circles around the sprinklers for irrigation. The radius correspond to the range of the sprinkler used. They can realize a watering area of 0 and 360 degrees. The radius of a sprinkler must reach another sprinkler header. The garden area must therefore be covered twice. For each sprinkler different nozzles are available to adjust the casting distances later. It is advisable to take this into account when planning.
Select the sprinklers
Now you have to choose the perfect sprinklers for your automatic irrigation. Measure the radius from your plan and convert them to the real measure with the help of your chosen scale. Now you have the radius of your future sprinkler. For small radius up to 5 meters use Hunter MP Rotator, for larger distances Hunter Rotator.
The throwing distance is not only dependent on the sprinkler model, but can also adjust with different nozzles. But it is always easier to shorten the distance than to increase. Also, the flow rate of water and the water pressure influence the throw lengths of sprinklers. Hunter provides tables with the characteristics and the nozzle on their website for each sprinkler.
With the information collected, you can now check the number of irrigation lines, as described in the blog entry: Calculation sprinkler.
Planning water pipeline
For the construction of the water pipeline, I recommend you to use the Gardena Quick & Easy solution. Since you have calculated the number of irrigation lines, now at the water connection (faucet or garden pump) an appropriate distribution must be provided. To control each irrigation line separately, a Hunter valve is necessary to implement. For each valve, a Homematic wireless switch and a connection to the DIN rail power supply units must be provided.
There are several ways to install these solenoid valves. On one hand, the solenoid valves can be mounted on the house or garage wall or you can use a device to install the valves underground, flush with the garden surface. It does not really matter how you do this, but the important thing is that you install the solenoid valves locally together and easily accessible. This is important for possible maintenance or future enhancements. Please note that distances and specifications for the electrical installation are observed during the course of the 220V cabling and the water pipes.
Furthermore, draw the water pipeline for the individual irrigation lines. Each of these lines must have a drain valve. In my blog Setup I’ve shown the existing Gardena pipeline elements that can be used. In the interplay of the Gardena Pipeline and the Hunter Sprinkler, the connection cross-sections must be observed. There are the variants ½ inch or 3/4 inch. In each irrigation lines, a Gardena drainage valve should be provided. This gives you the option of de-watering the water pipeline and protecting it from frost damage during the winter.
Shopping Garden irrigation parts
Now that the planning is complete, put yourself now a shopping list along with the necessary parts. I bought garden irrigation on Amazon.
You are on my blog: Automatic garden irrigation Checklist

 Draw circles around the sprinklers for irrigation. The radius correspond to the range of the sprinkler used. They can realize a watering area of 0 and 360 degrees. The radius of a sprinkler must reach another sprinkler header. The garden area must therefore be covered twice. For each sprinkler different nozzles are available to adjust the casting distances later. It is advisable to take this into account when planning.